Looking for software to migrate data from G Suite to Office 365? Well, you are on the right page. Let's explore common user queries to perform the same process using manual methods. G Suite is now called Google Workspace and also provides access to many applications, such as Google Drive, Gmail, Calendar, Hangouts, etc. Despite all the many useful features, users still want to migrate G Suite to Office 365 migrator. There are many reasons why users prefer to change/move Google account mail to O365. We can continue the import process and learn about the different techniques to export G Suite to O 365 user account.
2 Simple Methods to Migrate G Suite to Office 365
Before moving from G Suite to MS Office 365, users need to move their IMAP Gmail mailbox to O 365. It also simplifies the overview of the entire migration process. Migration from the G Suite mailbox requires the MS Office Management Center to transfer the required IMAP account data.
Method 1: Manual Migration from G Suite to Office 365
For completing the migration process, use the following steps of the manual method:
Step 1: Check if the user owns the domain
First, all users need to check and verify if the user account is a registered domain.
Step 2: Add one or more accounts to Office 365
For users, it is obvious to add one or more users as needed. When adding data, the user must bring the mailbox on Exchange online to perform the export process.
After completing verification, the domain mailbox and mailbox created in O 365, close the wizard and do not continue installing the domain.
Step 3: Create the Gmail mailbox export list
To migrate from G Suite to Office 365, create a migration file containing a list of all Gmail mailboxes. One of the simplest ways is to use an Excel worksheet. When the user lists the entire list, the password for each Gmail mailbox is first requested in the list. If the user does not rely on the password, he can also assign a temporary password by resetting the password for each mailbox. The user can add up to 50,000 mailboxes in the migration file and the file can be a migration file and the file can be a large file of 10MB. You can follow the following steps:
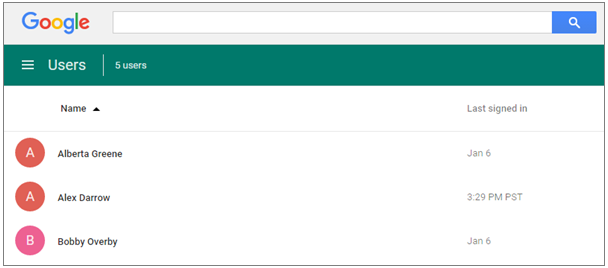
1. First, log in to the G Suite management console with administrator credentials (i.e. username and password, i.e. username and password).
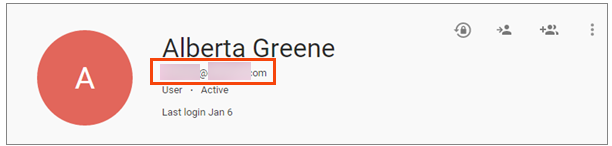
2. Select the user option, then select the user and identify the user's email address.
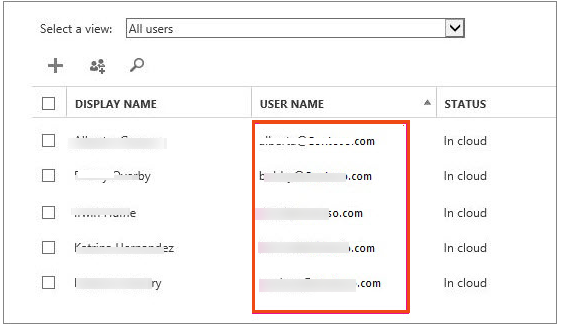
3. Login to the Office 365 Management Center, then go to Users >> Select "Active User" and find the "Username" column and keep the MS Office 365 window open.
4. Start MS Excel and use the screenshot above to create and transfer the file to Excel.
5. Start with the header on line 1 and make sure it clearly matches the screenshot above. The title name is as follows:
- e-mail address - username - password
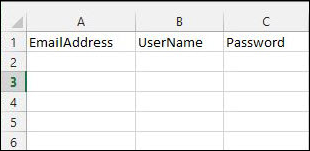
6. Enter the e-mail address of the desired mailbox as well as the username and password.
7. Save the file as CSV file format and then close the Excel worksheet.

Step 4: Connect Microsoft Office 365 and Gmail inbox
1. Open the Exchange Management Center, then navigate to "Recipients" >>, then click "Migrate" >> "Migrate Endpoint".
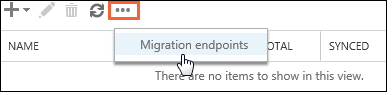
2. To create a new migration point, select the "New +" option.
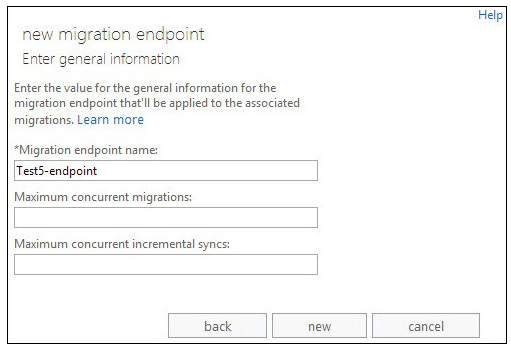
3. Select IMAP on the Select Migration Endpoint Type page.
4. On the IMAP migration configuration page, set the IMAP server to imap.gmail.com and keep the default settings.
5. Press the Next button to access the page for entering general information.
6. Open the "Enter general information" page and enter the name of the migration endpoint.
Step 5: Open the Gmail mailbox conversion and create a batch migration
1. First, launch / visit MS Office 365 Management Center and select Exchange.
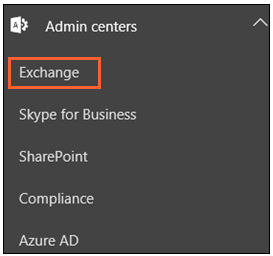
2. In the Exchange Center, visit Recipient >> and then migrate.
3. Now, click "New >>" and then click "Migrate to Exchange Online".
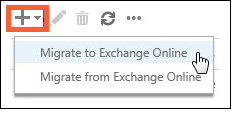
4. Select IMAP migration and click "Next".
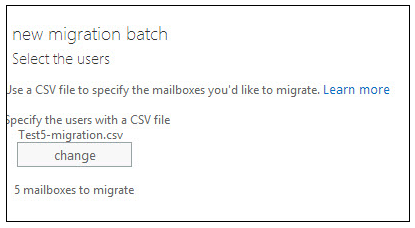
5. Now select the user page and go to the file created in MS Excel >> Office 365. Now verify the account.
6. After verification is complete, Microsoft Office 365 will show that there are no users who have moved or migrated G Suite to Office 365 in the file.
7. Click the Next button.
8. Select the migration endpoint and check all the default values on the IMAP configuration page, then Next button.
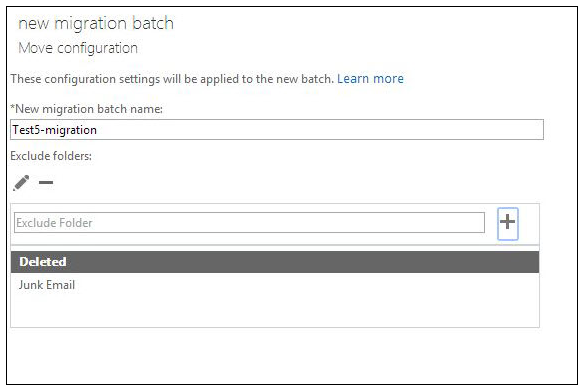
9. Enter the name of the migration batch, then Go to the configuration page and finally click on the Next button.
10. The "Start Batch" page provides users with two options:
- Browse the migration report to send copies to other users.
- Select Automatically start batch processing, then New option and start the synchronization migration process.
Step 6: Direct Gmail to Office 365 and update DNS records.
DNS records are called MX records and their primary purpose is to deliver emails. To start this process, follow some of the defined steps:
1. Sign in to Office 365 now, go to the Domain page
2. Select a domain and fix the problem.
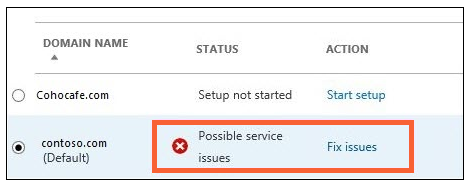
3. Choose the problem to solve?
4. After adding the record, you can preview the message to indicate that the domain is set up correctly.
Step 7: Finish syncing with Gmail
After verifying that all emails have been routed to Office 365, users can bulk delete the process and stop synchronizing Gmail and Office 365. To delete the migration batch, do the following:
1. Go to EAC, locate the recipient and perform the migration.
2. Open the migration verification:
- Open the recipient, then, migrate to EAC, then Confirm that the migration batch is no longer listed in the dashboard.
Secure Method to Export Mailbox from G Suite to O365
The above process is a lengthy process that requires manually importing and moving emails from Google account emails to Office 365. We also demonstrated automated software that can quickly and efficiently convert the Gmail suite in Outlook 365.
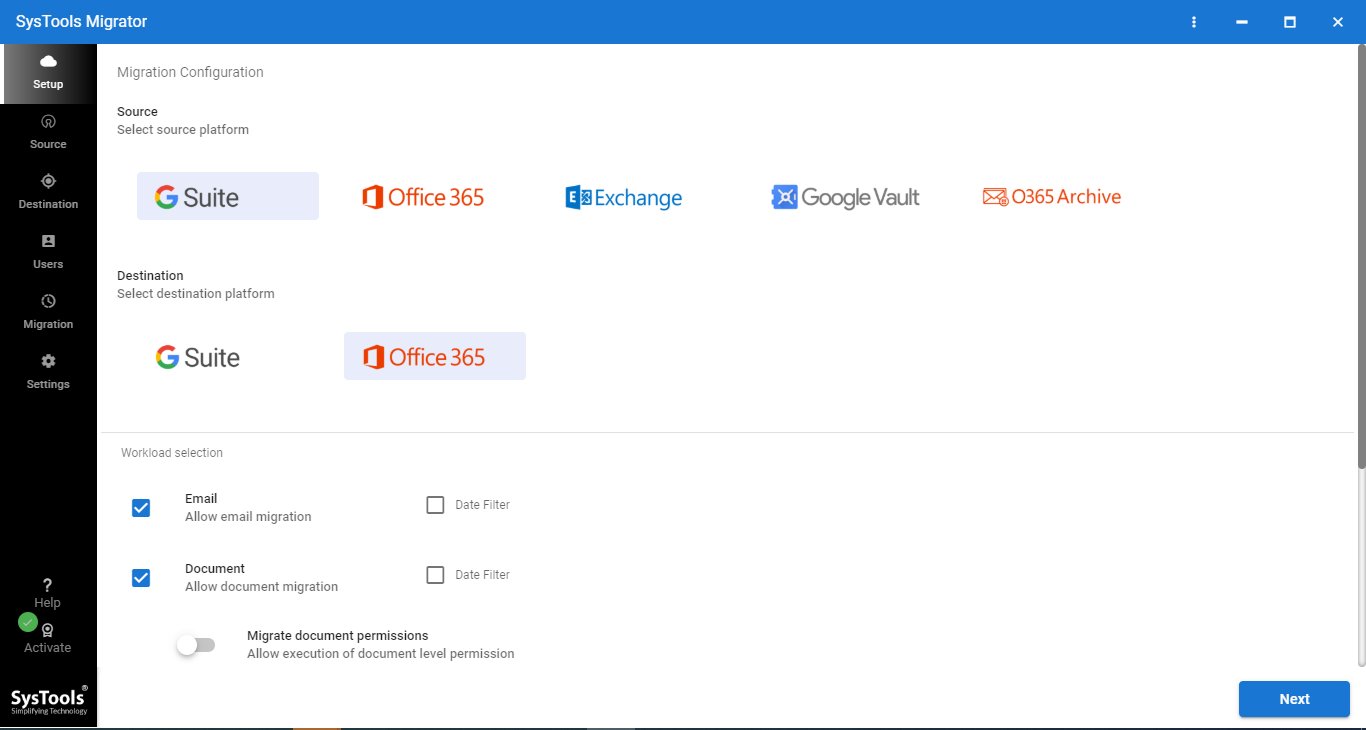
PCVITA Google Workspace to Office 365 software is one of the best tools for migrating email from G Suite to Office 365 and has many advanced features that make users happy. It has many filter options to help users selectively export Google account emails, contacts and calendars to Outlook 365. The most important feature is that the whole process can be completed in a few simple steps. It allows you to move multiple users of your G Suite domain to Office 365 at the same time.
How the Software Works:
- Run the tool and register your domain.
- Select G Suite and Office 365 as source and destination respectively.
- Choose data category-Emails, contacts, calendars, and set filters.
- Enter the details of the G Suite domain and Office 365 domain.
- Fetch user accounts for the migration.
- Click Start to start the migration after setting priority on certain mailboxes, if required.
Concluding Lines
The following article states that the whole application is completely user-friendly and can follow a result-oriented process. The previous Google Suite to Office 365 Migration Guide can be considered the appropriate informational procedure for migrating G Suite to Office 365 user accounts. This briefly describes the various processes through images so that users can easily and accurately follow each step. This article introduces two methods, one is a long manual process and the other is a directly automated tool.